Follow this 5-step guide to get up and running with GitPassword: Prepare Private Repository → Connect Vault → Set Master Credentials → Add Items → Multi-Device Sync & Conflicts.
1. Prepare a Private Git Repository
We recommend setting up a dedicated Private Repository on GitHub, GitLab, Gitee, or self-hosted Gitea:
- HTTPS Format: e.g.,
https://github.com/your-name/vault.git - SSH Format: e.g.,
git@github.com:your-name/vault.git - Local-Only Mode: If you prefer offline single-machine usage, leave the remote URL blank and specify a local directory.
2. Repository Settings & Initialization
Launch GitPassword to open the repository connection screen:
- Enter a remote Git URL or an existing local repository path in the "Git repository URL or local path" field.
- You can also use the provider icons below the field to choose a repository source, or use the folder icon to select a local path.
- Click "Clone". GitPassword opens or clones the repository and initializes its dedicated
gitp branch. - To adjust connection options, use the settings button in the lower-right corner before cloning.
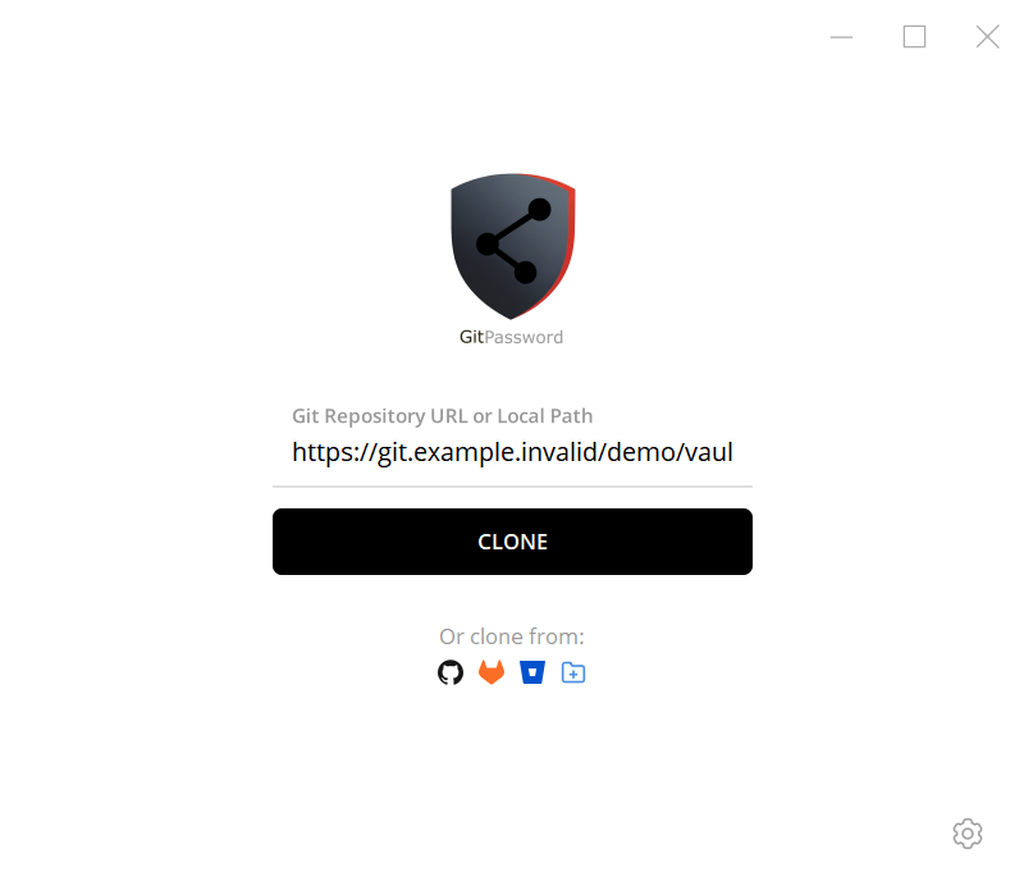
Figure: Enter a repository URL or local path in the shared field, then click "Clone."
After cloning an empty repository, GitPassword opens the "Create Account" screen:
- Enter a username, master password, password confirmation, and vault display name.
- Under "Security Encryption Mode," choose "Master password only" or "Master password + Vault Secret."
- The master password is used for local Argon2id key derivation. Registration data is stored in the current Git repository, not in your Git hosting account.
- Keep the master password and, when enabled, the Vault Secret safe. A lost credential cannot be recovered.
- Click "Create New Account" to enter the workspace. If the repository already contains an account, use "Back to Login" at the bottom of the page.
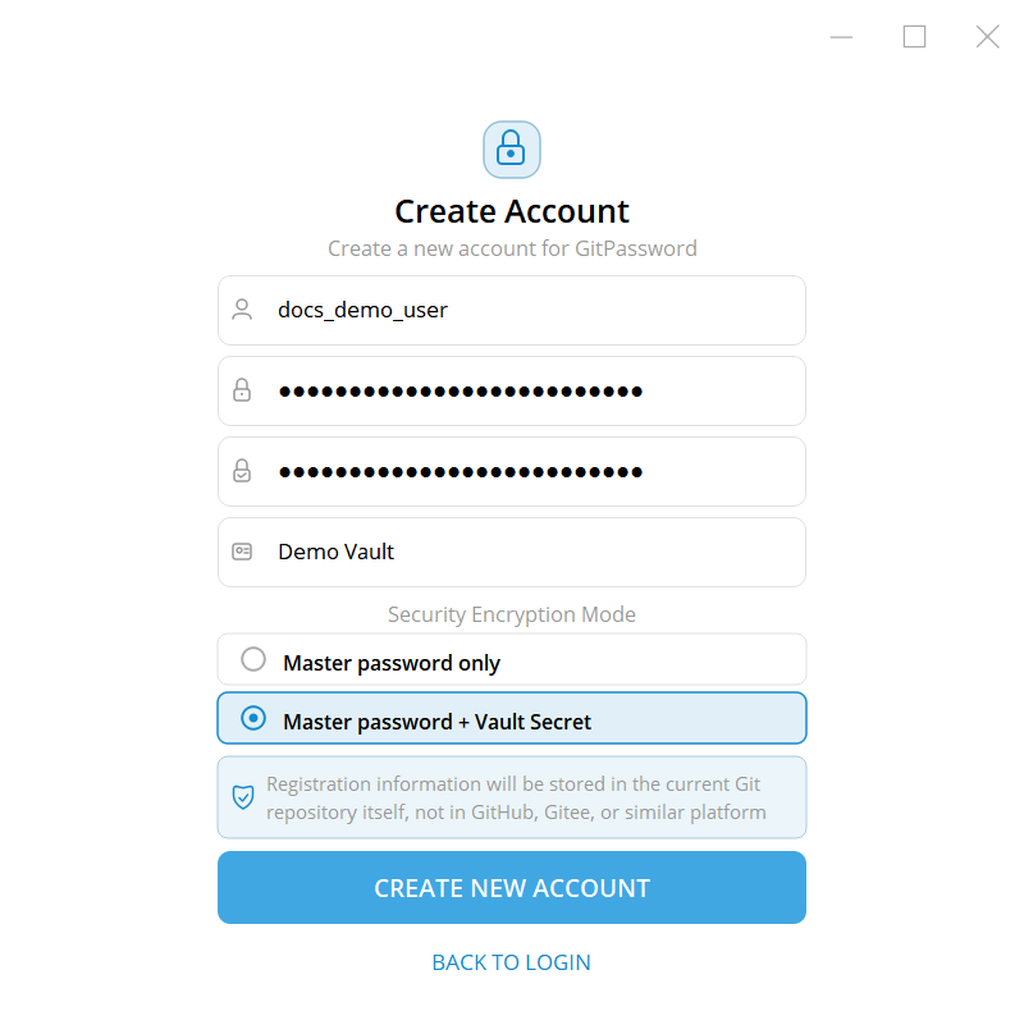
Figure: Enter the vault identity and select the "Master password + Vault Secret" security mode.
4. Add Your First Items
Click the "+" button above the item list:
4.1 Add and View Passwords & Credentials
- Select "Add Password" to open the details pane.
- Enter a title, username, and password, then optionally add a website URL, tags, and notes.
- Click "Save" to encrypt the data locally and write it to the Git repository.
- Select a saved item in the left-hand list to view its details. Passwords remain masked by default; use the eye button to reveal one temporarily, or copy the username or password.
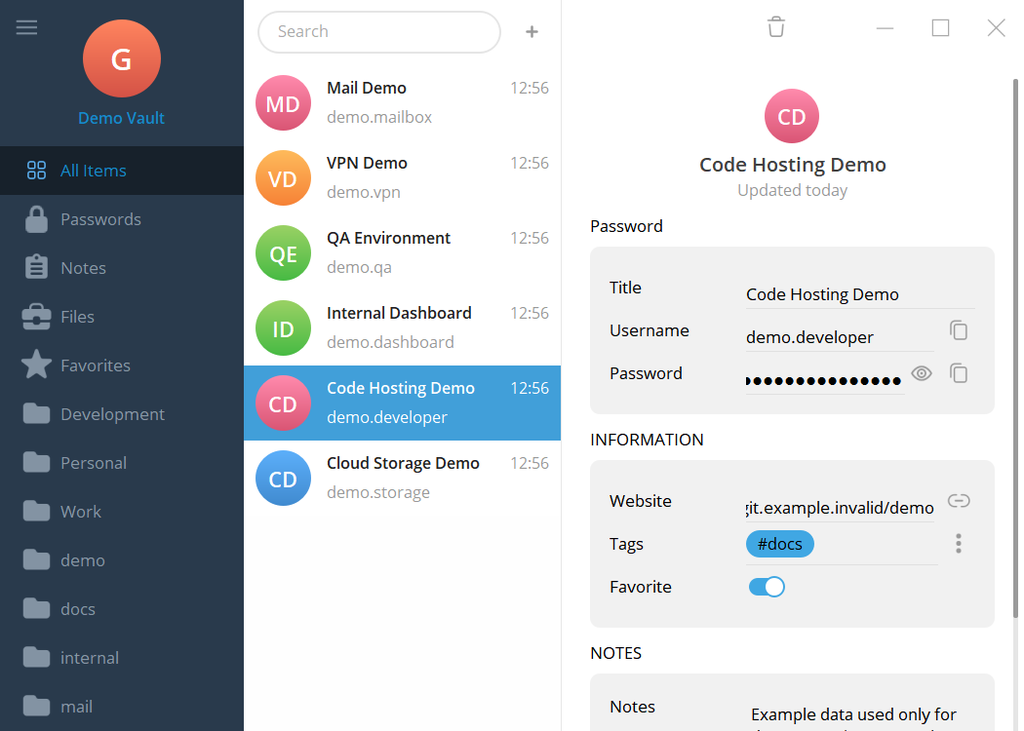
Figure: "Code Hosting Demo" is selected on the left, and its saved details appear on the right with the password masked.
4.2 Add Encrypted Notes
- Select "Add Note", enter a title, and type Markdown content.
- Draft Protection: Changes are encrypted and saved locally in real time, preventing data loss across unexpected restarts.
- Click "Save" when finished.
4.3 Add Secure Files
- Select "Add File" and choose files to import (SSH keys, certificates, scanned contracts).
- View file metadata (name, size, type).
- Plaintext-Free Preview: Preview images and text, and stream audio/video directly in the app without temporary plaintext files.
- Click "Save" to encrypt the file in 64 KiB authenticated chunks into your local vault.
5. Multi-Device Sync & Conflict Resolution
- Silent Auto-Sync: When online, the client automatically synchronizes with your Git remote on startup and save.
- Multi-Device Access: Install GitPassword on another device, connect to the same repository, and sign in with the matching master password and Vault Secret (when enabled) to decrypt and synchronize the data.
- Conflict Resolution: If two devices edit the same item offline:
- A red "Conflicts" indicator appears in the left sidebar.
- Open the conflict item and switch between "Local Version" and "Remote Version" to inspect each version and its modification time.
- Select the version to retain, then click "Choose Local" or "Choose Remote" to resolve the conflict.
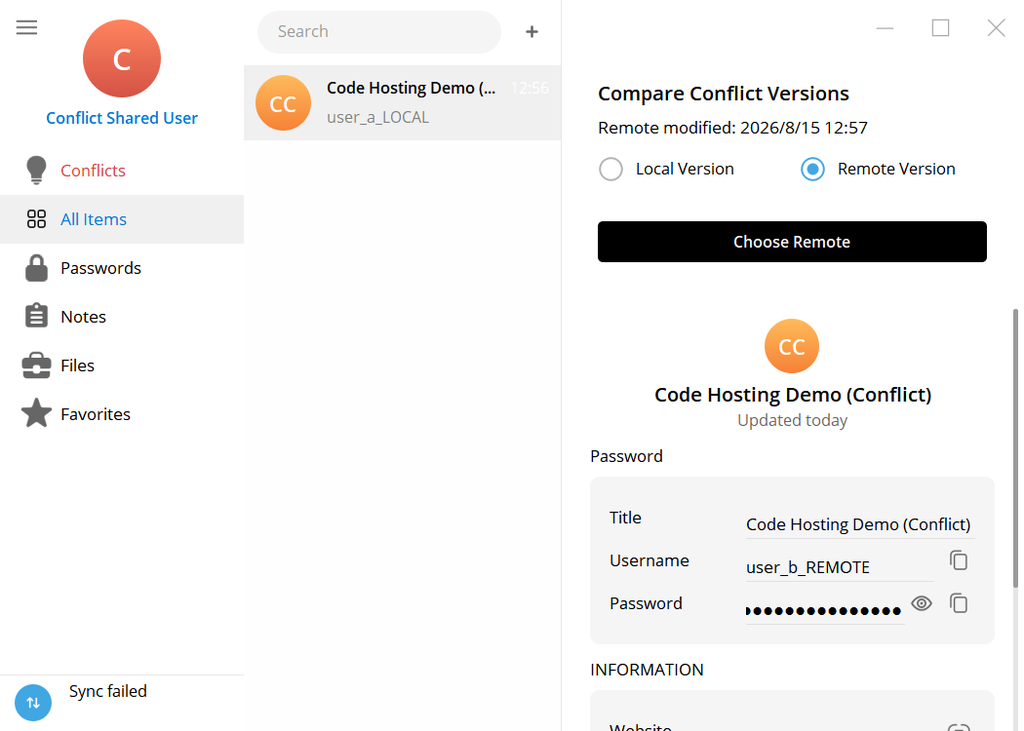
Figure: "Remote Version" is selected, so the action button will resolve the conflict with the remote content.
Next Steps